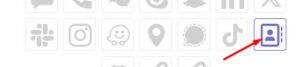
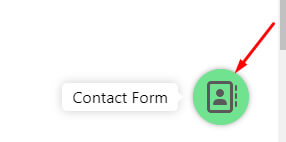
Add Contact-form channel after scroll the page and click on Setting Icon.
when you click on setting icon, advance setting for selected channel will appear.
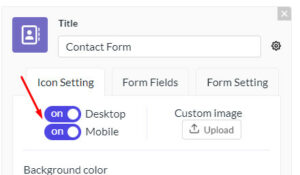
1.Go for icon setting.
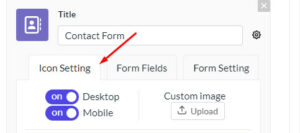
If you want the widget to show on the desktop, keep the radio button on.
If you don’t want the widget to show on the desktop, keep the radio button off.
if you want to change the background color of the channel go to the background color and change the color save the widget.
if you want to change the icon color of the channel go to the icon color and change the color save the widget.
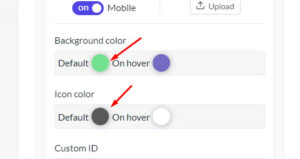
After save the widget check if it is fronted side background color and icon color is changed or not.
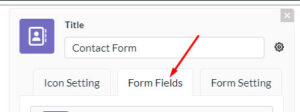
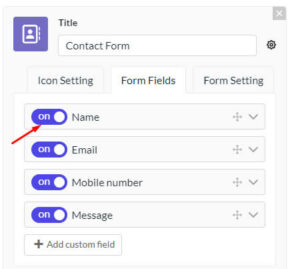
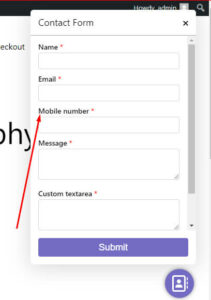
2.Go for Form Fields.
Turn on the radio button of the field you want to show on the desktop save the widget.
If you want to add a custom field, click on the add custom field button and click on the Custom field you want to add after save the widget.
After the widget is saved,Check the fronted side Form fields is added or not.
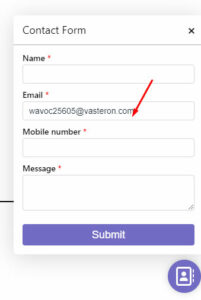
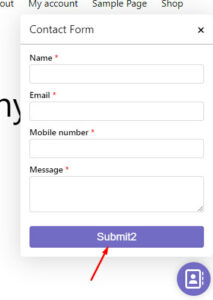
if fronted side contact form is added after click on fields input and fill up the all fields and click on submit button.
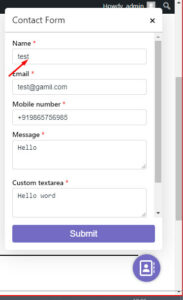
After clicking on the submit button, go to the form fields and check whether the fields have been filled or not.
![]()
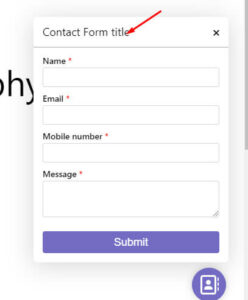
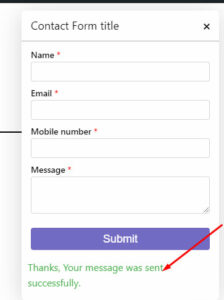
1.If you want to change the title of the contact form,go to the form title input and enter the title you want to add save the widget.

After save the widget,check if it is fronted side,Title is changed or not.
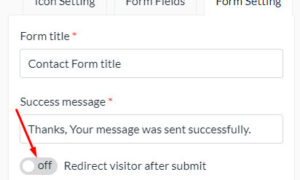
2.If you want to change the Success message of the contact form,go to the Success message input and enter the Success message you want to add save the widget.
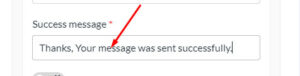
After save the widget,check if it is fronted side,Success message is changed or not.
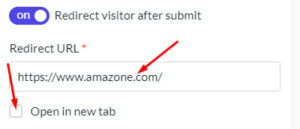
3.If you want to open a URL after the submit form,Go for Redirect visitor after submit and on Radio button.
Add the URL you want to add in Redirect URL input and save the widget.
If you want to open a URL in new tab,Click on checkbox button for Open in new tab
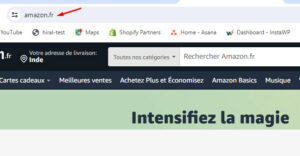
After save the widget check if it is fronted side URL is opened a new tab or not.
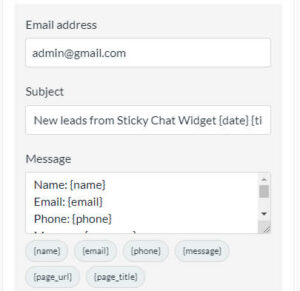
3.Click on Send leads to mail Radio button.
![]()
4.Enter the Email Id you want to add to the Email input field
Add the Subject you want to add to the Subject input field.
Enter the message you want to add to the message input field.
Fill the All Fields After save the widget.
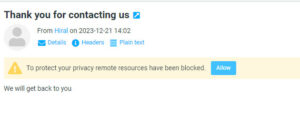
After save the widget,Open contact form in fronted side.
Enter the email address you want to send the email to in the email input field and click on submit button.
After Sending the mail Check mail id Mail is received or not.
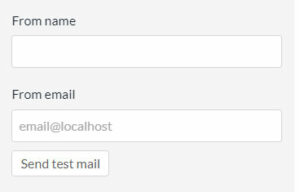
4.Click on Auto Res ponder Radio button.
![]()
Add the From Name you want to add to the From Name input field.
Add the From email you want to add to the From email input field.
Click on Send Test mail button.
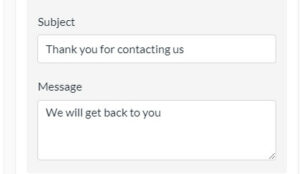
Add the Subject you want to add to the Subject input field.
Add the Message you want to add to the Message input field.
Add the To email address you want to add to the To email address input field and Click on Submit button.
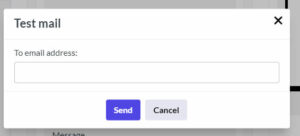
After Click on submit button check mail id mail is received or not.
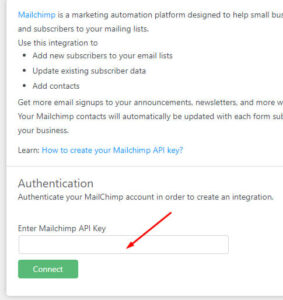
Go to the sidebar-menu and Click on Integrations.
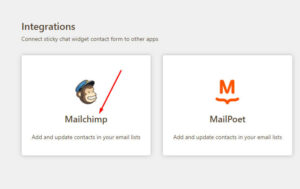
Open the integrations page after click on Mail chimp.
After the click on Mail chimp open the Mail chimp page.
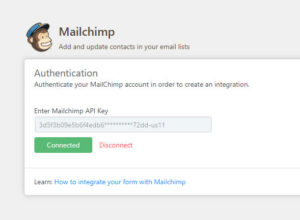
Enter the valid key in Enter Mail chimp API Key input and click on Connect button.
Click on the connect button to check whether the key is connected or not.
After the key is connected go to sidebar menu and click on Sticky-Chat-Widget and click on Edit button.
After the Edit button open the page Click on Contact form go for setting button and click on setting button.
After clicking on the setting button, go to the form setting and check if Sends leads to mail chimp is added or not.
If Sends leads to mail chimp is added after click on radio button for Send leads to mail chimp.

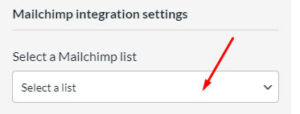
After the click on send leads to mail button,Select any one option from
Select a Mail chimp list drop-down.
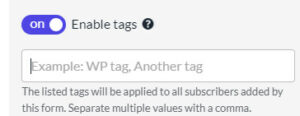
Click on Enable tags radio button.
![]()
Enter the tag you want to add to the Enable tags input field.
Click on Enable groups radio button.
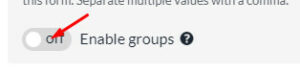
Select any one groups from drop-down you want to add for the Enable groups drop-down.
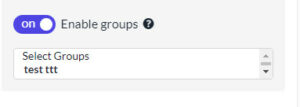
Adding the custom fields you want to add will show in the fields mapping.
Adding the all fields after check mail chimp account fields is added or not.
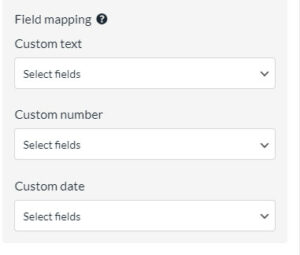
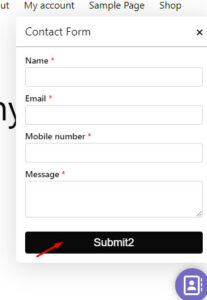
If you want to change the submit button name go for button text input.
Add submit button name you want to add and click on save the changes button.
After save changes check if it is fronted side button text is changes or not.
If you change background color and Text color for submit button go for Text color and Background color and change the color and Save the widget.
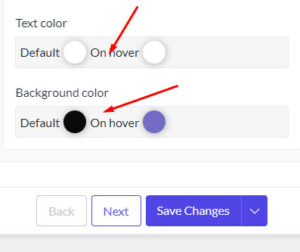
After save the changes check if it is fronted side color is changed or not.